The four-step method (works for any degree)
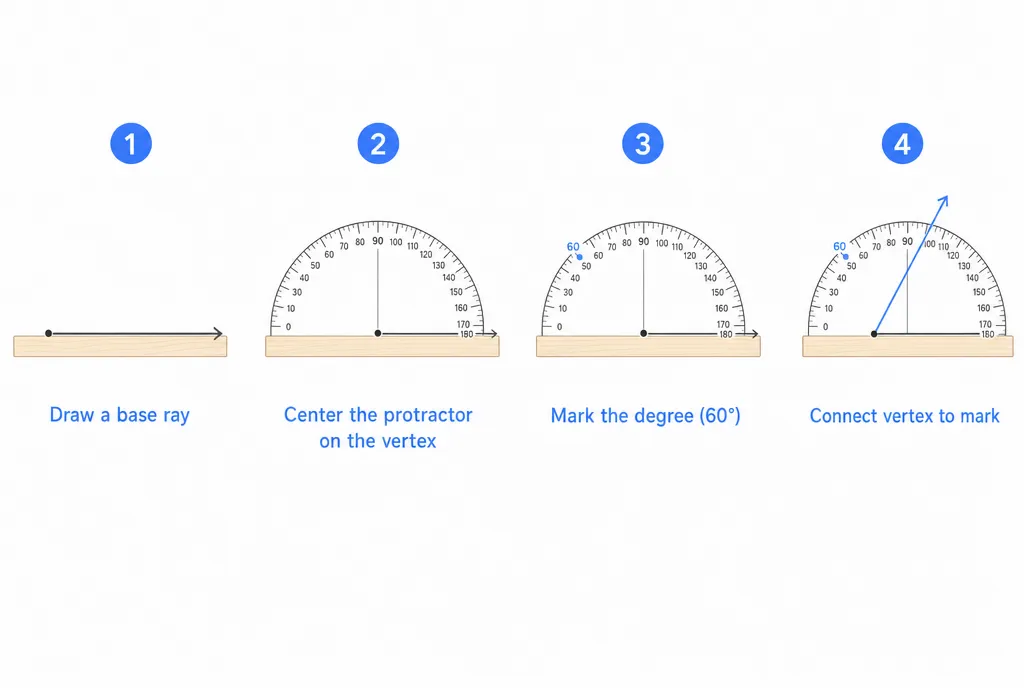
Every angle you’ll ever construct — 30°, 45°, 117° — comes from the same four moves:
- Draw the baseline. Use a ruler to draw a straight line, longer than you think you need. Mark a clear dot at one end (or anywhere on it): this is the vertex, the corner of your angle.
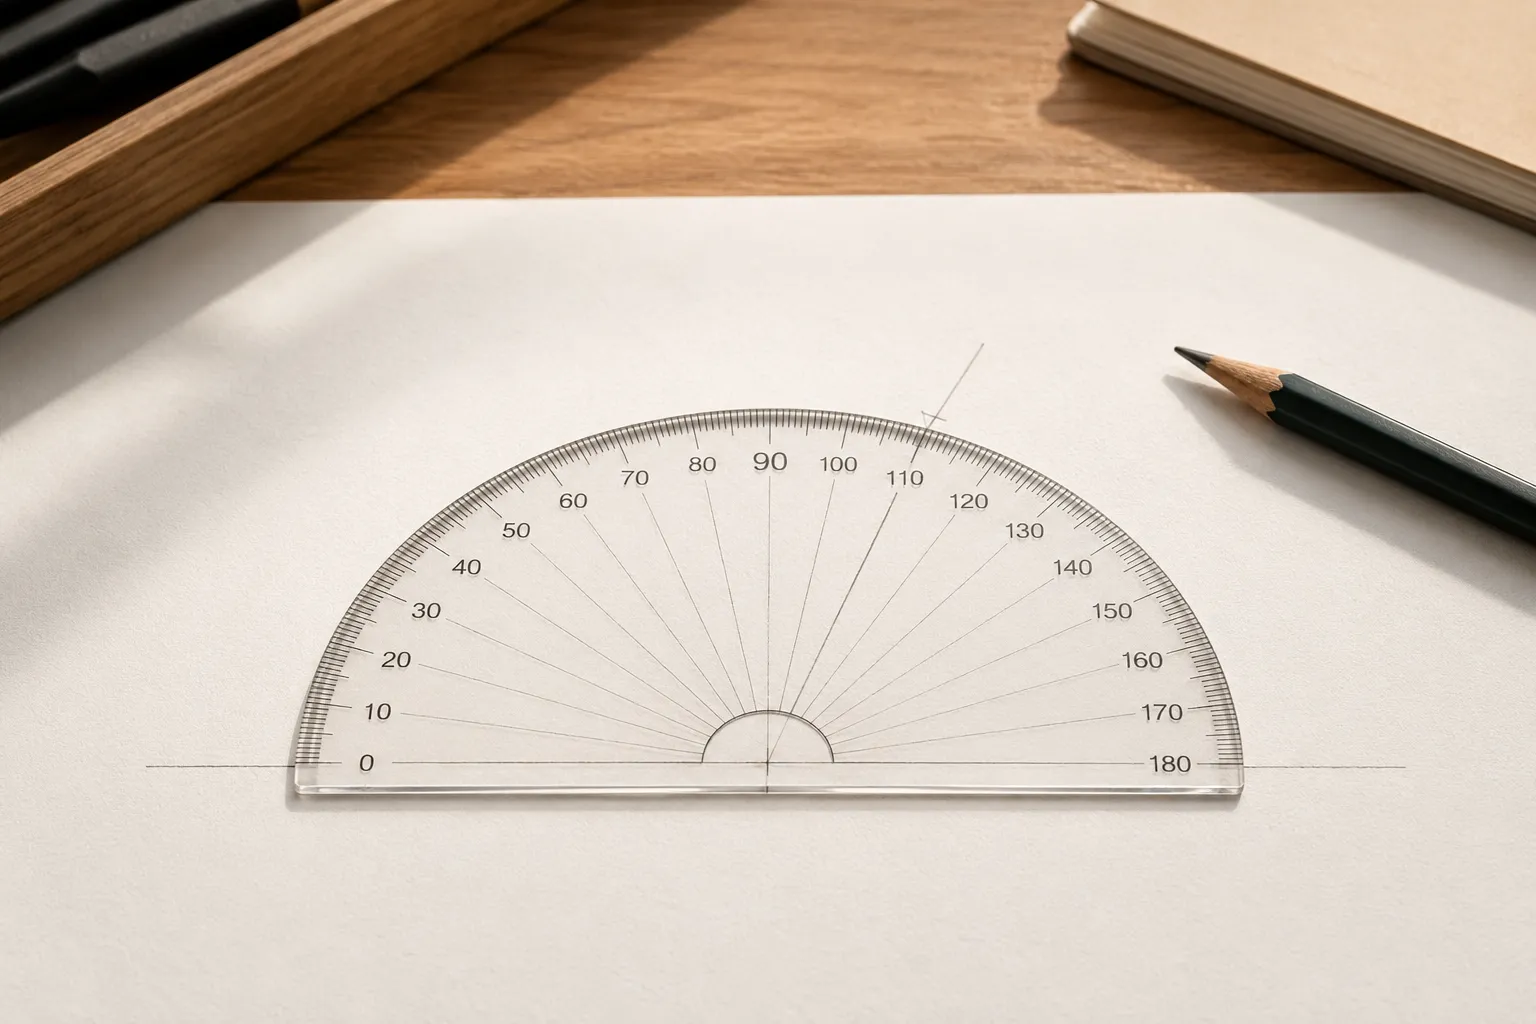
- Center and align. Place the protractor’s origin — the small hole or crosshair at the middle of its flat edge — exactly on the vertex, with the 0° line lying along your baseline. Both alignments matter; a protractor that’s centered but rotated, or aligned but off-center, draws the wrong angle.
- Mark the degree. Find your target number on the curved scale and make a small, precise pencil dot just outside the protractor’s edge.
- Connect. Lift the protractor away and draw a straight line from the vertex through the dot with a ruler. Done — the opening between baseline and new line is your angle.
If you’ve measured angles before, you’ll notice this is the same setup in reverse — measuring reads a number off an existing ray, drawing plants a dot where the ray should go.
The two-scale trap
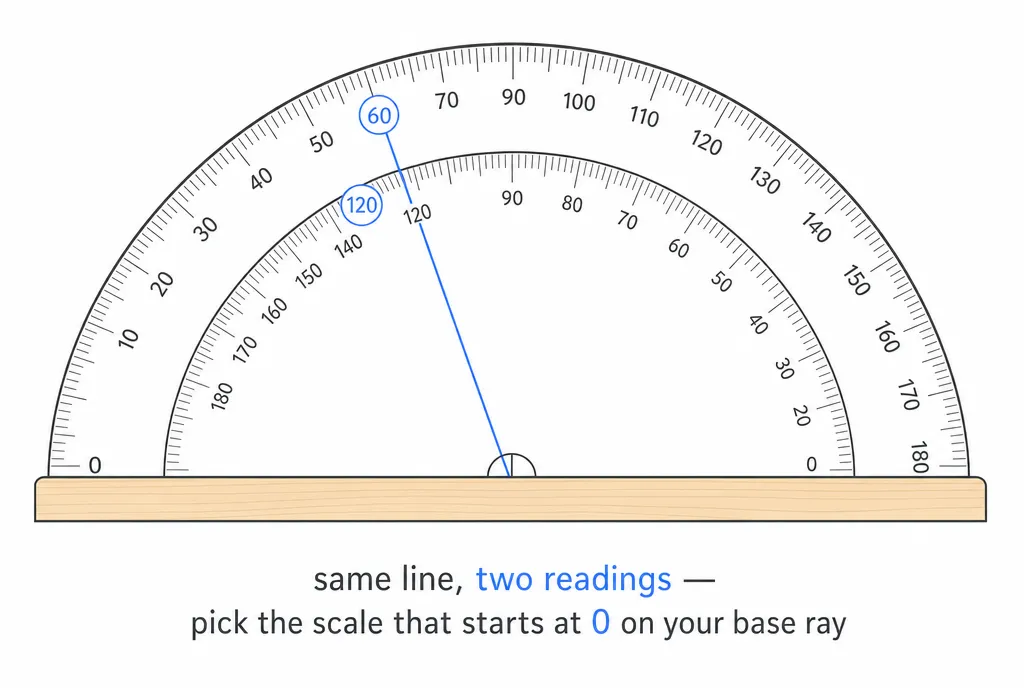
A standard protractor carries two arcs of numbers: one running 0–180° left to right, the other 0–180° right to left. They exist so you can work from either end of the baseline — and mixing them is the single most common drawing mistake.
The rule: use the scale that reads 0° on your baseline. Put the protractor down, look at where your baseline exits under the scale, and note which arc says 0 there. That arc is yours; ignore the other one completely.
Then sanity-check the result. An acute angle (under 90°) should look visibly sharper than a square corner; an obtuse angle should look wider. If you meant to draw 45° and the result looks broad and open, you marked 135° on the wrong arc. A quick refresher on the angle families makes this gut-check automatic.
Worked example: 45°
Draw a baseline and mark the vertex at its left end. Center the protractor, align 0° along the line to the right, and follow the scale that starts at 0 on the right side up to 45. Dot it, connect, and check: the angle should split a square corner exactly in half. Sharp, clearly less than 90° — that’s 45°.
Worked example: 120°
Same setup. This time follow your scale past 90° and dot at 120. The finished angle should look wider than a square corner but well short of a straight line. If your dot landed at what turns out to be a sharp angle, you read 60° off the wrong arc — the mirror image of the number you wanted.
Drawing a reflex angle
A reflex angle is bigger than 180°, and a half-circle protractor can’t reach it directly. You don’t need it to. Since a full turn is 360°, the reflex angle and the ordinary angle beside it always add up to 360.
To draw 300°: compute 360 − 300 = 60, draw a 60° angle with the four steps above, and your 300° angle is the opening on the outside of it. Sketch a small curved arrow around the outside so anyone reading the drawing knows which opening you mean. This works for any reflex angle — 200° is the outside of 160°, 270° is the outside of a square corner.
Checking the angle you drew
Two quick verifications, no second protractor required:
- The fold test (45° and 90°). Fold the paper through the vertex so the baseline lands on itself: the crease is exactly 90°. For 45°, fold so one ray lands precisely on the other — if the fold line splits the angle cleanly, the halves match and the angle is true.
- Measure the drawing. For any other degree, measure your construction the same way you’d measure any printed angle. No protractor within reach? Photograph the page and drag the two arms of an online protractor onto your rays — the readout should land within a degree of your target.
A degree or so of slack is normal for pencil work. If you’re off by more, the usual culprits are a fat pencil dot, an off-center origin, or — nine times out of ten — the wrong scale.